Optimization of JPEG (JPG) images: good quality and small size
Last updated: 2008/09/16
Return to the main page
Introduction
The image compression techniques have their origin in the
necessity of reducing the size of the file used to store the image, which is huge when
compared to storing text (a 800x600 24 bit color uncompressed image needs 1440000 bytes
or 1.37 MB). One of the most popular formats is
JPEG (which uses files with
JPG or JPEG extensions), which can achieve compression ratios of 10:1 with almost no
perceived loss of the image quality.
Depending of the program that you use for saving JPEG images, there are available some options
for adjusting the compression of the image. In this article I'll try to explain how to adjust that
options and optimize the ratio between image quality and file size. It's important take
into account that some images are more suitable than others for JPEG compression (see flat images compression below).
Basic compression options
The two basic options that are almost always present in every "Save JPEG" dialog are the
compression/quality of the image, and the standard/optimized/progressive formats.
Both compression and quality refers to the same parameter but one is the inverse of the other (e.g. in a
percentage-based scale 35% compression is equal to 65% quality). Depending of your program of choice you'll find
either, but the result is the same: the more compression, the lesser image quality. The proper setting for this
parameter depends of the image quality or file size you need/want to obtain, getting the best ratios with 50%-85%
of image quality (equivalent to 50%-15% compression).
The standard (baseline) and optimized (baseline optimized) settings provides the
same image quality but the optimized format provides a 2%-8% reduction of the image
file size, so there is no reason for not use always this setting when not using the progressive
format. The progressive format also provides the same quality, but offers an alternate method
of displaying the image while it is downloaded, at the cost of a slight increase in the file
size (more details about progressive encoding).
Advanced options
Apart from that options, some programs like Corel PhotoPaint, Paint Shop Pro and IrfanView (this one is freeware) allow choosing the type of image
subsampling, also called downsampling. The subsampling ratios according to the spec are 4:4:4 (no subsampling),
4:2:2 (standard subsampling) and 4:1:1 (worst quality, rarely used). Adobe Photoshop also contemplates this option but it's adjusted automatically depending on the
quality level selected: it applies subsampling for Medium and Low
levels and uses no subsampling for Maximum and High
(more
details about subsampling/downsampling).
While the standard subsampling is usually adequate for most images, providing an good ratio between image
quality and file size, there are some situations in which using no subsampling (4:4:4) provides a noticeable increase
in the image quality, even if you use a higher compression ratio in order to maintain the file size. The most notable
cases are when the image contains some portions with fine details, like text over an uniform background, and images that
contain almost-flat colors.
Examples
First we'll see an example of compression of images with fine detail:
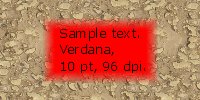
JPEG image, 15% compression (85% quality), standard subsampling (4:2:2), 8822 bytes.
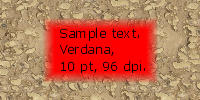
JPEG image, 25% compression (75% quality), no subsampling (4:4:4), 8096 bytes.
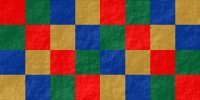
JPEG image, 15% compression (85% quality), standard subsampling (4:2:2), 5276 bytes.
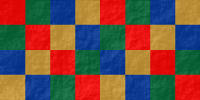
JPEG image, 25% compression (75% quality), no subsampling (4:4:4), 5151 bytes.
You can see than even with more compression (in order to achieve a similar file size) using no subsampling
(4:4:4 format) produces sharper images.
On the other hand, for landscapes, portraits and similar types of
pictures with more "general" details, the standard subsampling gives you more compression with almost
no perceived loss of quality:
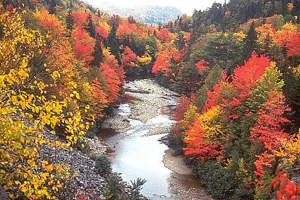
JPEG image, 35% compression (65% quality), no subsampling (4:4:4), 22454 bytes.

JPEG image, 35% compression (65% quality), standard subsampling (4:2:2), 18461 bytes.
In this cases, adding some soft smoothing reduces the file size without increasing the
perceived loss of detail:

JPEG image, 35% compression (65% quality), standard subsampling (4:2:2),
25% smoothing, 16481 bytes.
With high levels of compression the smoothing can improve a bit the image quality, reducing
the JPEG compression artifacts. Of course, too much smooth will result in a blurry image with
less detail.
Further optimizations
Almost all digital cameras store by default EXIF data in the
pictures taken with them. This data include information about the camera configuration and conditions at the time
of the photo shot. This information usually takes a lot of space, so make sure that saving this data is disabled in
your graphical application when optimizing JPEG files (e.g.: in a test, an 800x600 JPEG picture saved at 75%
quality was reduced from 114 KB to 51 KB after stripping the EXIF information).
IrfanView, a freeware graphic
viewer/converter, has a plugin for JPEG lossless transformations that allows stripping this data (and other similar
like IPTC information) from a JPEG file
without recompressing the image itself. In this way you can remove the unnecessary information while maintaining
the original image quality.
Flat images compression
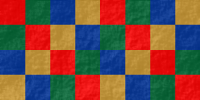
Since the JPEG format was designed for photos, images that are composed mainly from solid colors
achieve a better compression with formats like PNG and
GIF (this one only supports up to 256 colors per image), and without any
loss of quality (lossless compression):

JPEG image, 15% compression (85% quality), standard subsampling (4:2:2), 2193 bytes.

JPEG image, 35% compression (65% quality), no subsampling (4:4:4), 2224 bytes.

PNG Image, 24-bit color, best compression (level 9), 1108 bytes.

GIF image, 4-bit color (16 color palette), non-interlaced, 916 bytes.
But if we use the lossless image formats for the first samples, the non-flat portion of the images makes the
final file size much bigger:

JPEG image, 25% compression (75% quality), no subsampling (4:4:4), 8096 bytes.
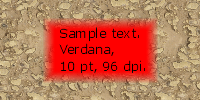
PNG Image, 24-bit color, best compression (level 9), 24649 bytes.
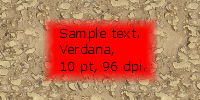
GIF image, 8-bit color (256 color palette), non-interlaced, 17783 bytes.

JPEG image, 25% compression (75% quality), no subsampling (4:4:4), 5151 bytes.
PNG Image, 24-bit color, best compression (level 9), 24287 bytes.
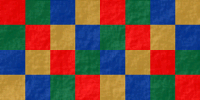
GIF image, 8-bit color (256 color palette), non-interlaced, 13031 bytes.
Recompression
Since the JPEG use lossy compression, saving the same JPEG image over and over will cause degradation in the
image quality even if you use the same quality settings, specially if you have enabled subsampling. Due to this is
recommended maintaining a "master" copy saved in a lossless format (PNG, TIFF
or proprietary formats like PSD or CPT)
in case you need to make some editing to the image or adjust the JPEG compression settings (a JPEG image previously
saved at 40% compression will not improve quality for saving it again at 15% compression).
Below you can see how recompression affects the image, even at high quality levels. With no subsampling the loss
is small but noticeable (you can see more noise around the text), but with subsampling the areas with fine details are totally distorted:
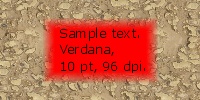
JPEG image, 5% compression (95% quality), standard subsampling (4:2:2), 14196 bytes. Saved directly from original PNG.
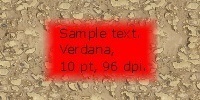
JPEG image, 5% compression (95% quality), standard subsampling (4:2:2), 13292 bytes. After recompressing the image five times.
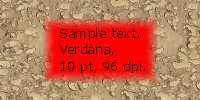
JPEG image, 10% compression (90% quality), no subsampling (4:4:4), 13710 bytes. Saved directly from original PNG.
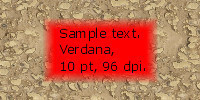
JPEG image, 10% compression (90% quality), no subsampling (4:4:4), 13700 bytes. After recompressing the image five times.
If for some reason you prefer (or need) to use JPEG for your master copies, use 0% compression (100% quality) with
no subsampling, since this reduce the loss of quality near to zero.
Final notes
- Image DPI is not relevant for screen images, since DPI is used only
for setting the print sizes of the image: an image of 600x400 pixels with 200 DPI will have the same display
and file size than a 600x400 100 DPI image, but the first one will be half the size when printed, although with
higher definition (since you put 200 dots in an inch of paper for the first image and 100 for the second) .
- JPEG doesn't support transparency (alpha channel), in that case you will need to use PNG or GIF formats.
Return to the main page


